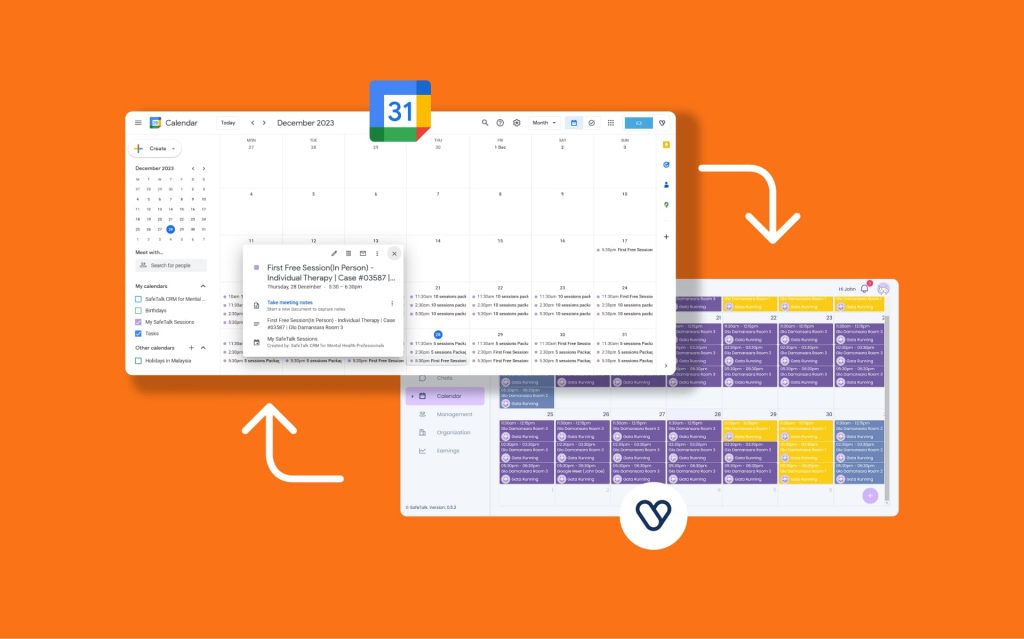
SafeTalk makes your booking effortless by allowing you to set up your availability & manage appointments for both you and your clients.
With SafeTalk’s Booking Schedule, you can:
- Set Your Availability: Define the days and times you’re available for appointments.
- Assign Rooms: Whether you offer in-person sessions or online therapy, you can link each session to a specific location.
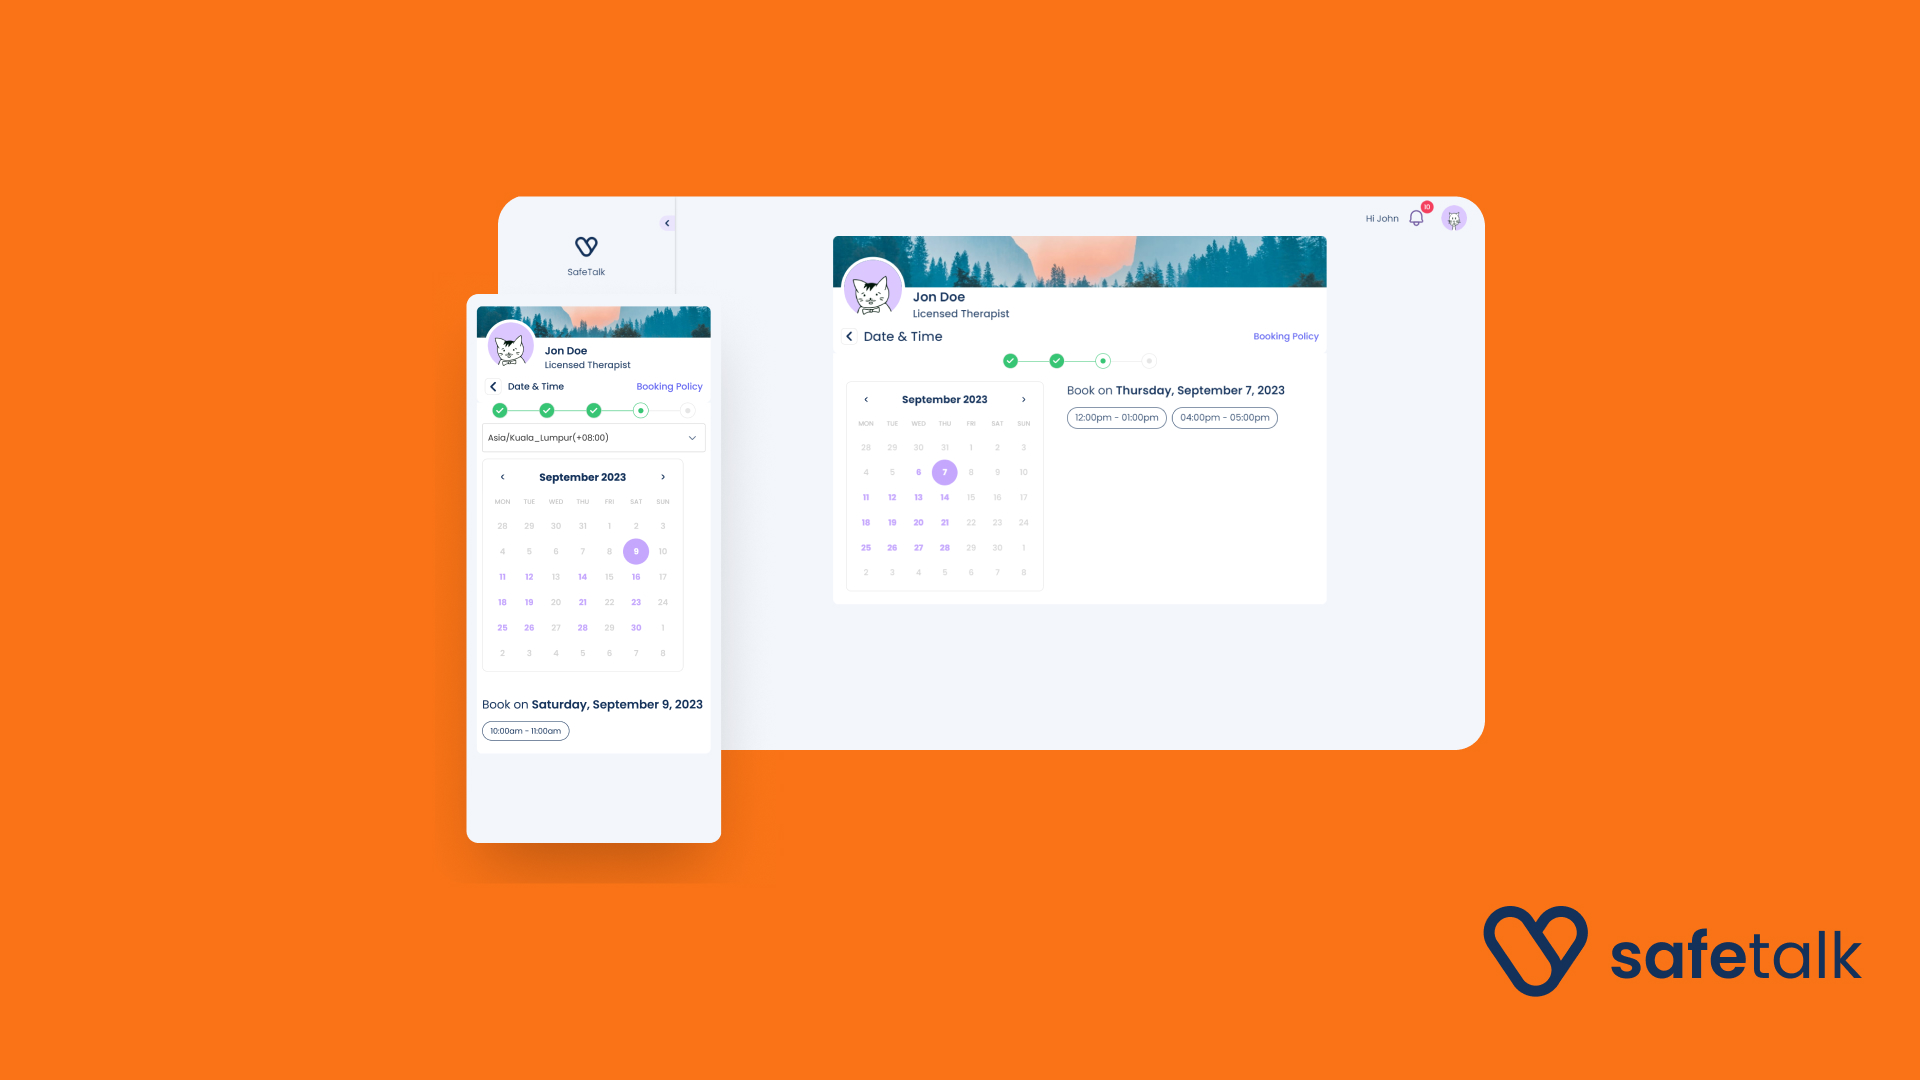
- Allow New & Existing Clients to Book: Clients can see your available slots and book sessions based on your set schedule.
- Prevent Overbooking & Conflicts: SafeTalk automatically manages your schedule to avoid double bookings
- Make Adjustments Anytime: Update your availability, block off personal time, or make last-minute changes when needed.
This guide will walk you through the steps to set up your availability and effectively manage your appointments in SafeTalk. Let’s get started! 🚀
Navigate to the Manage Availability Page
- Login to your SafeTalk account
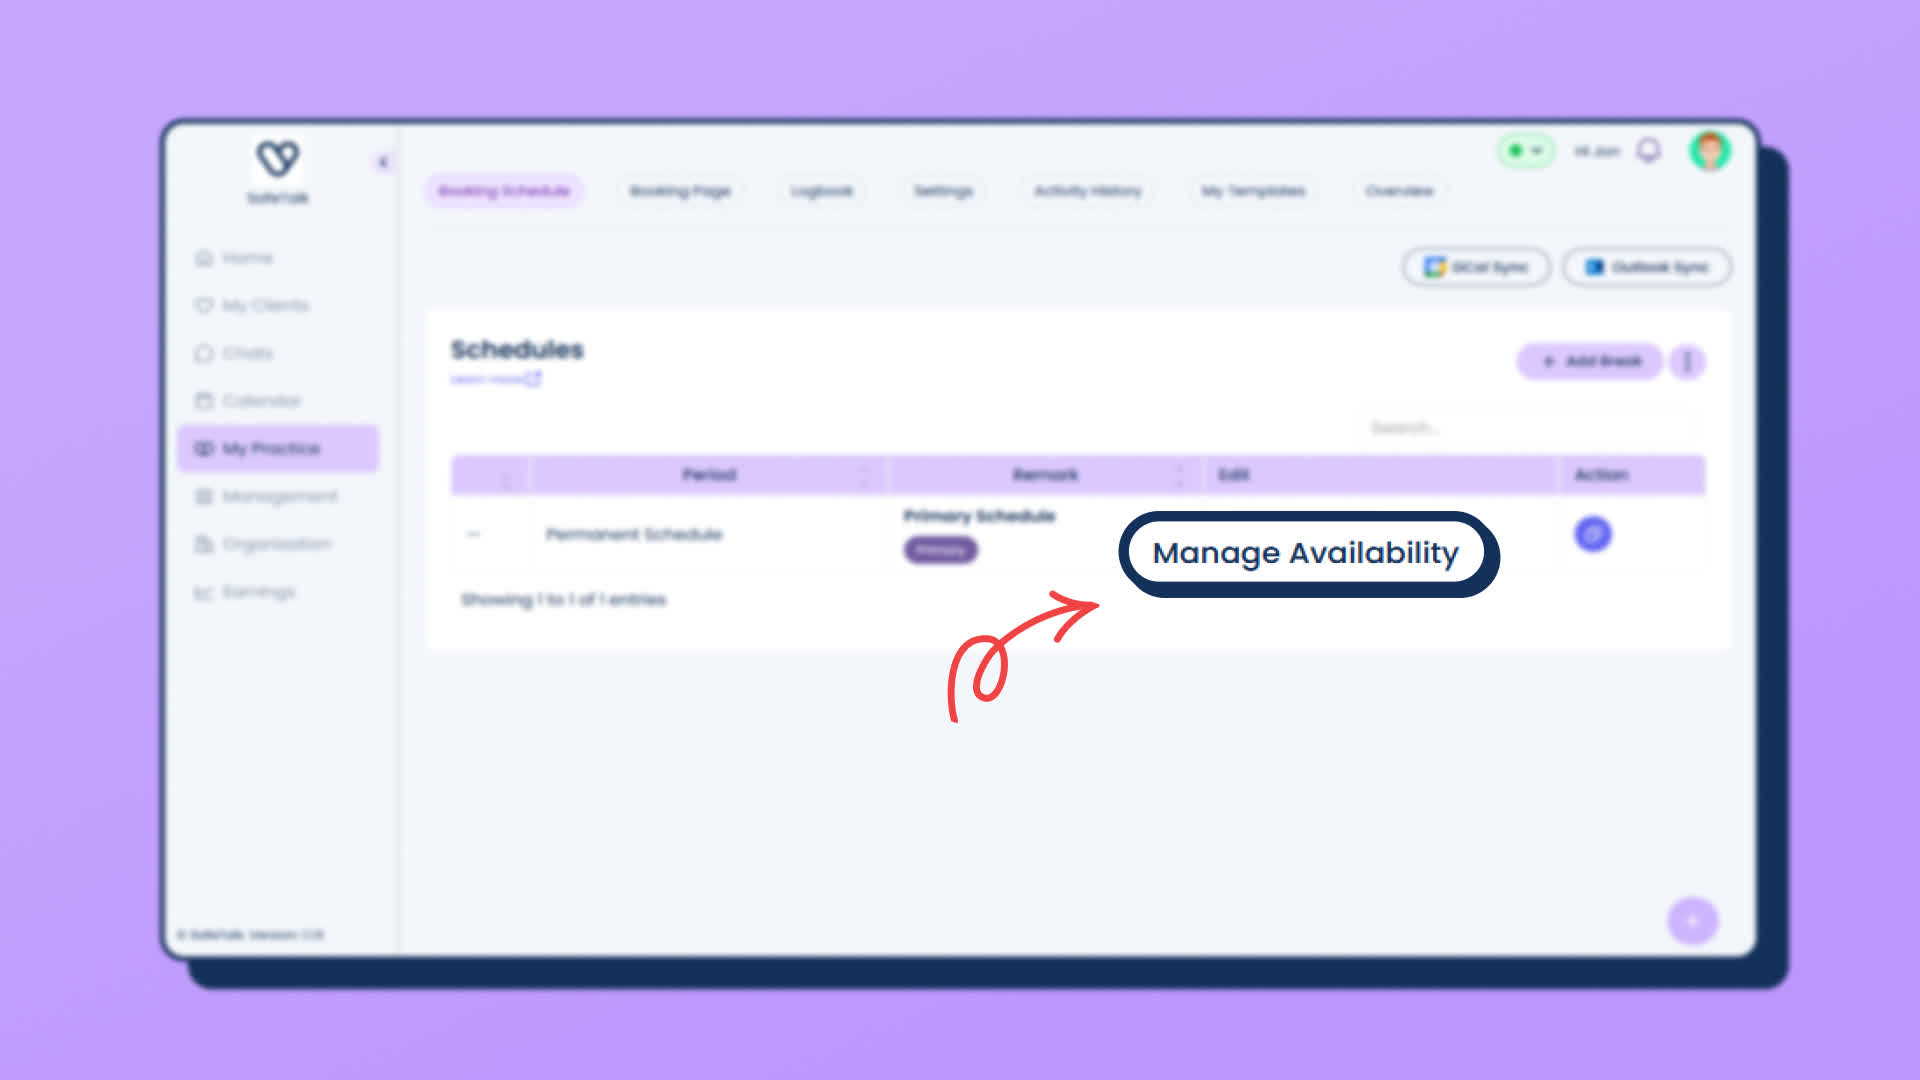
- Click on My Practice & select the Booking Schedule tab
- Find your Permanent Schedule & click on Manage Availability
Step1: Quick setup your availability
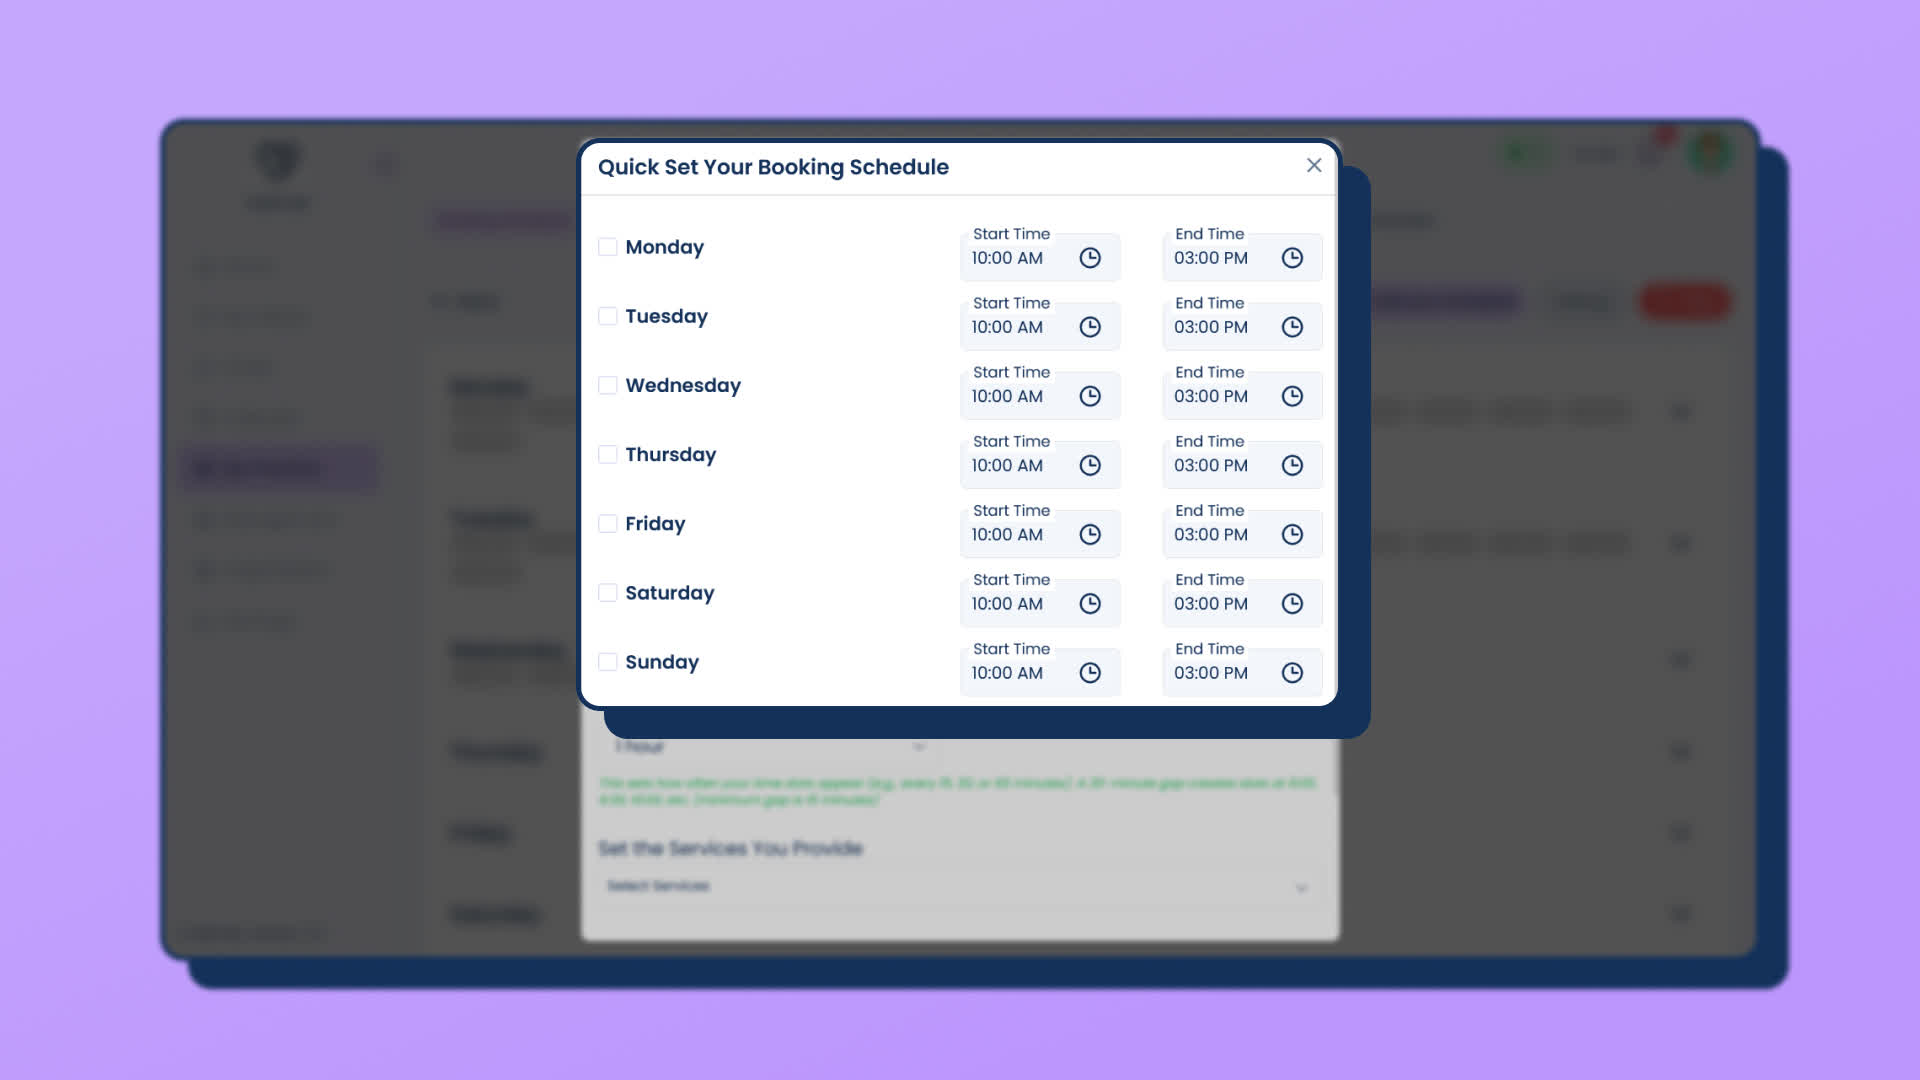
First let’s quick setup your availability. On top right, click the + Add your Schedule button, and a popup will appear:
Now let’s complete the fields here:
- Firstly, let’s set your schedule for different days of the week. Select the days you are working & set your start and end time. You can have a different availability for each day of the week
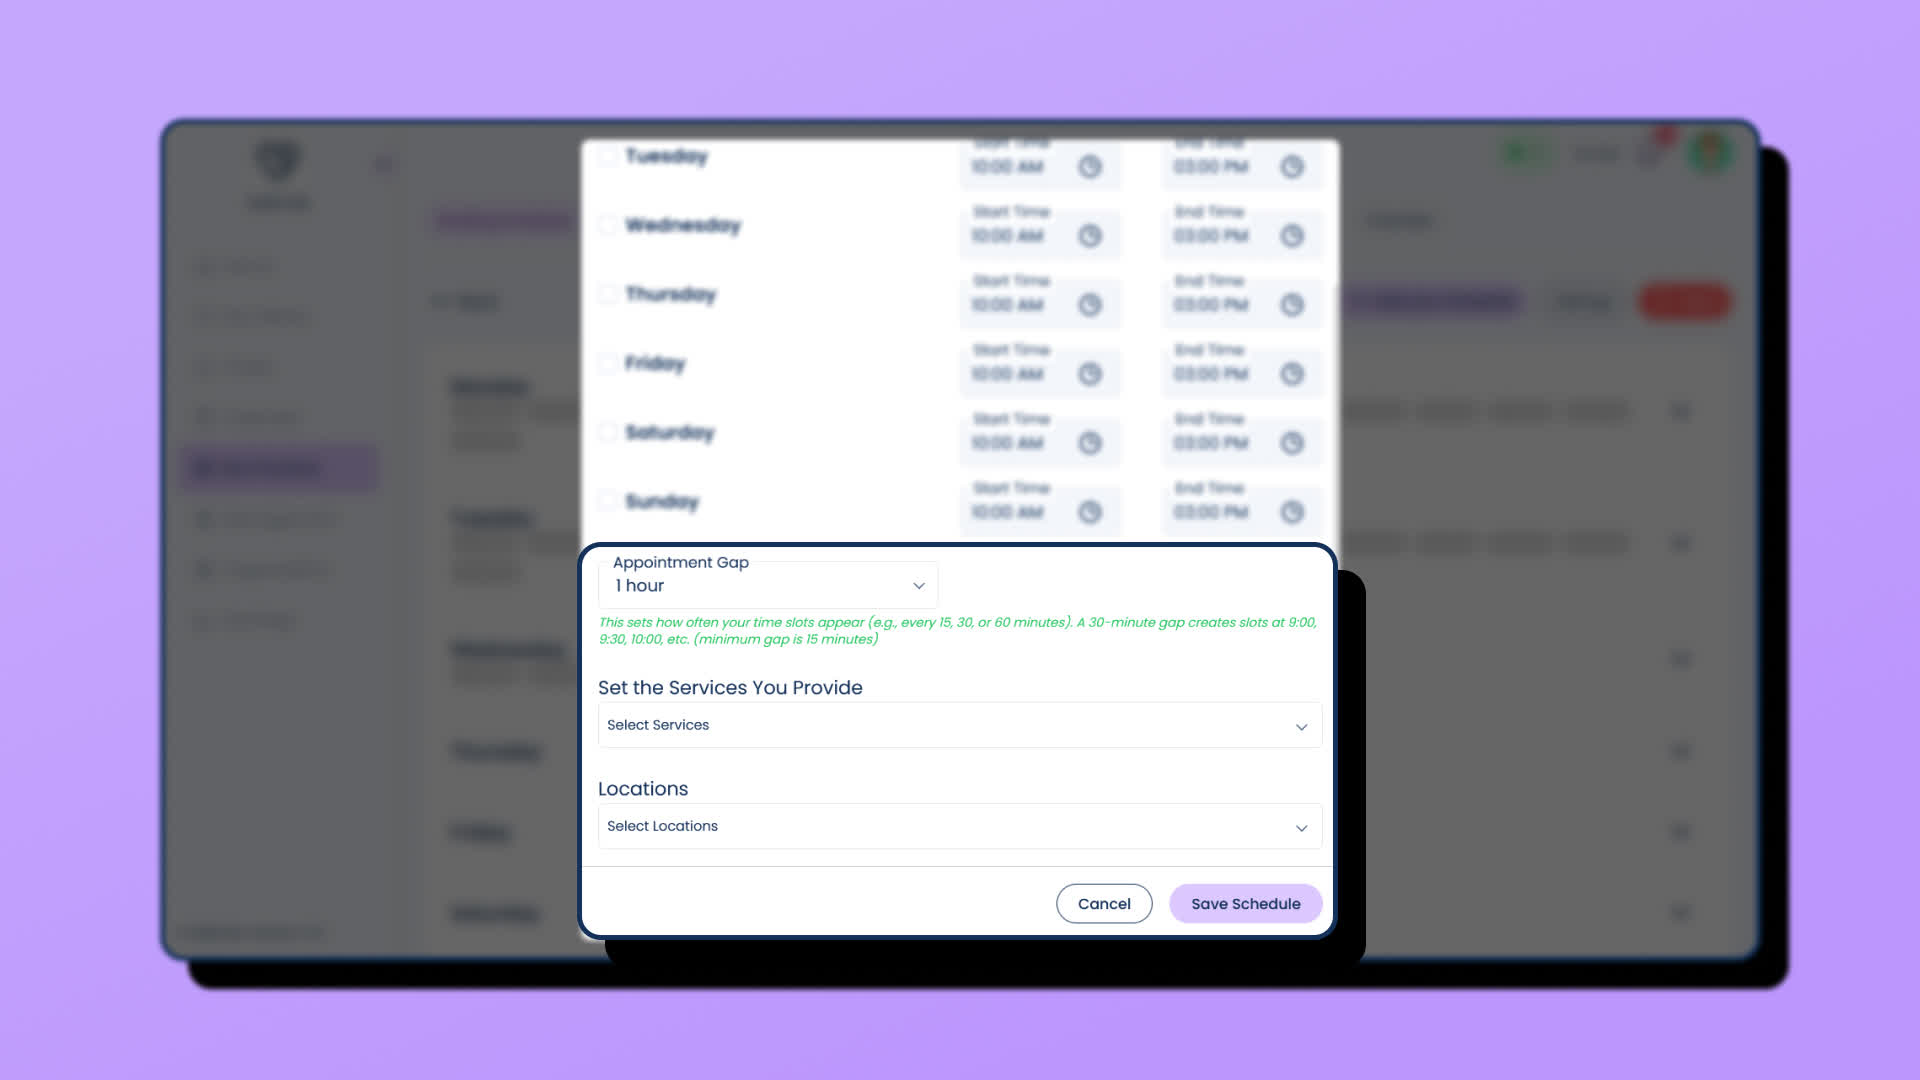
- Next you need to select your Appointment Gap Duration. This will set the duration between your availability slots. Example, if you set your Monday availability, from 10AM – 3PM & select 1 hour Appointment Gap, your availability slots will be 10AM, 11AM, 12PM, 1PM, 2PM
- Select your Services / Therapy Packages that clients can select when making a booking
- Select the Locations/Session Type that clients can select when making a booking
Scroll the end of the popup and click on Create. Give few seconds and your schedule is set.
Note: your session durations are set in the Services in the Management->Services. You can have different session duration for different services. Example: Client Intake Sessions can be 30 minutes, while Individual Therapy Sessions are 60 minutes. If a client book a 10AM slot for Client Intake, the session will be 10AM-10.30AM. And if the client select 10AM slot for Individual Therapy, the session will be 10AM-11AM.
Step 2: Fine-tuning your availability slots
Once your booking schedule has been set, you’ll see your availability time slots under each day of the week(ex. Monday, Tuesday).
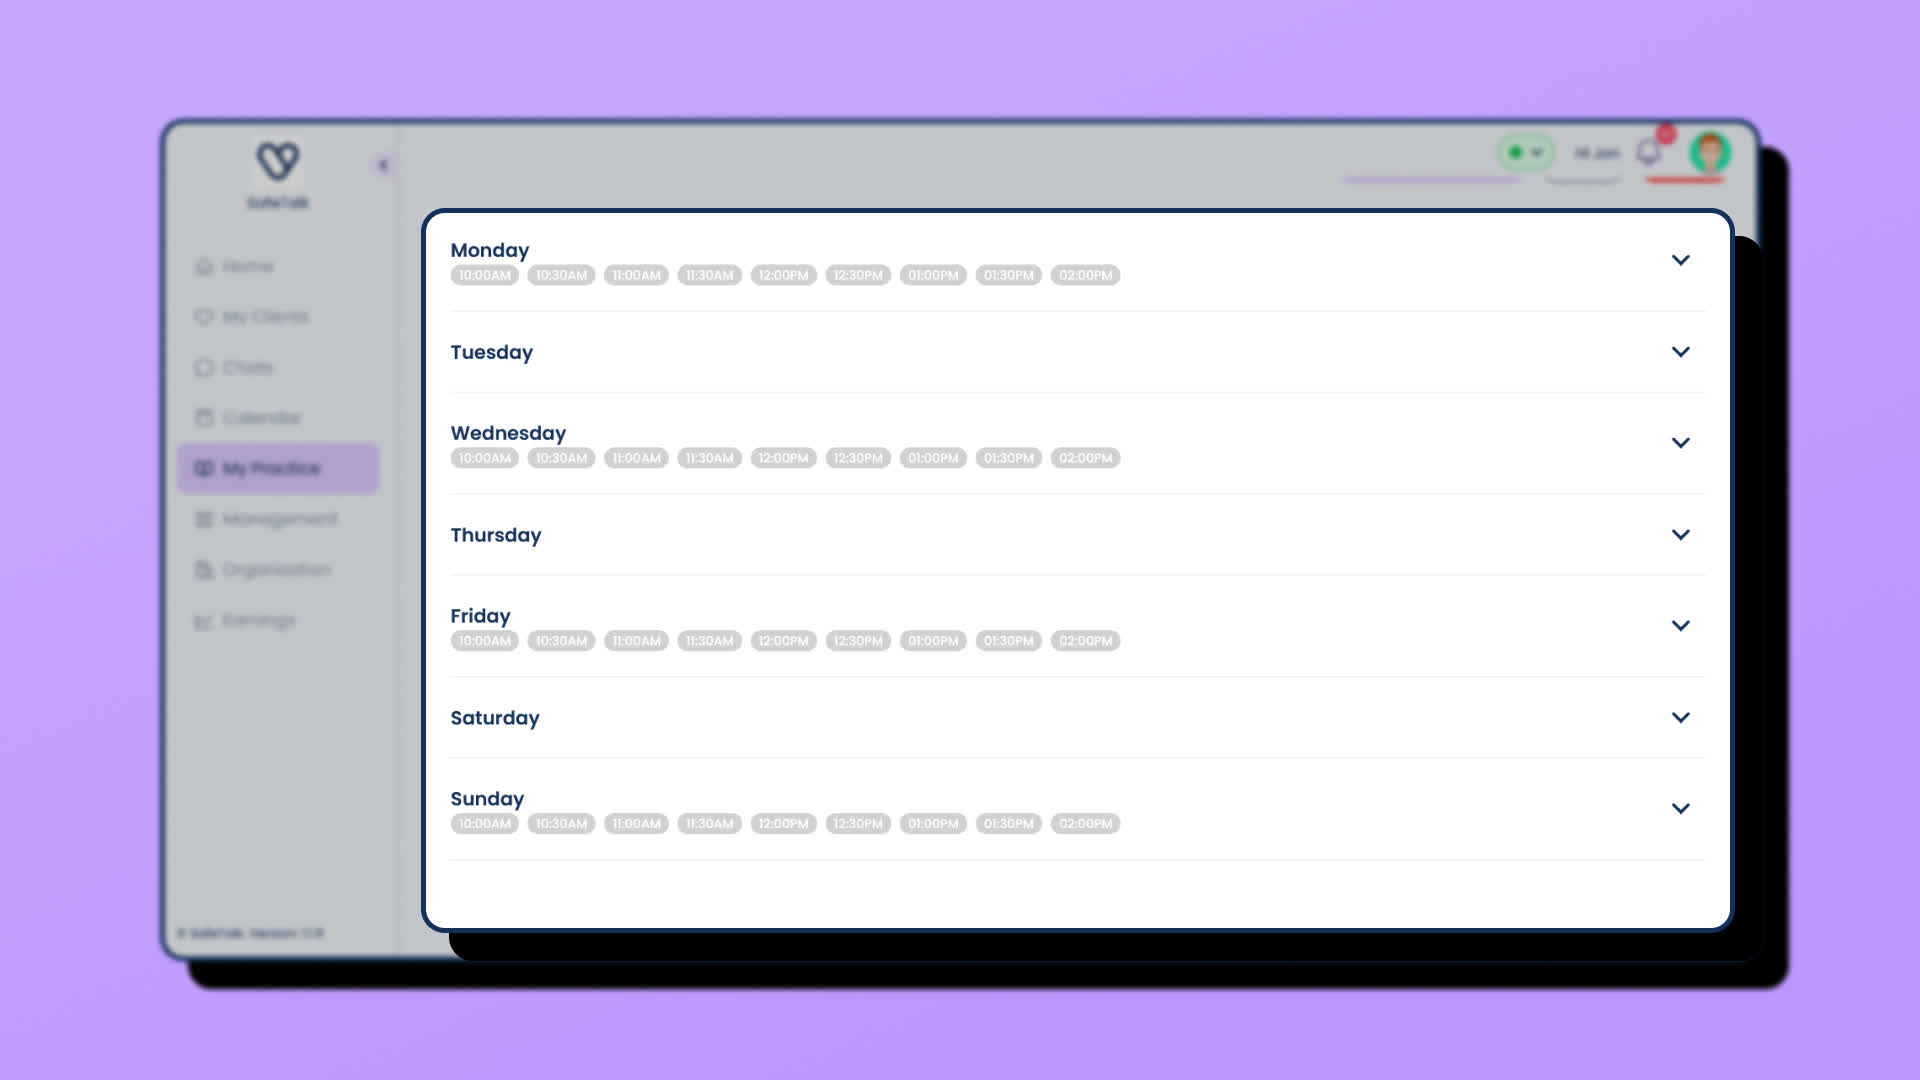
You can click the arrow on the right and see a detailed view of each availability slot. Here you can adjust each individual slot separately, such as changing the time, services and locations. Once complete, click the tick(✅) button on right side next to the timeslot to update it
Resetting Your Schedule
Need a fresh start?
- Click Clear on the top right to reset your schedule to empty and start again!
Booking Settings
Booking Rules
At the top of the Booking Schedule page, click “Settings” to configure your overall booking rules.
Here you can control:
- Booking Lead Time (hours) – Set how many hours in advance a client must book before a session.
- Max Days for Future Bookings (days) – Control how many days ahead clients are allowed to schedule appointments.
- Session Cancellation / Rescheduling Cut-off (hours) – Define how many hours before a session clients can cancel or reschedule.
- Max Sessions in a Day (sessions) – Limit the maximum number of sessions you want to accept per day.
Adjust these settings to suit your practice needs, then click “Update Settings” to save your changes.
You can also manage your Intake Form and Consent Form from your account settings to ensure new clients complete the required documents before their first session.
For a step-by-step guide on automating intake and consent forms, read:
👉 Automate your therapy Intake Forms for better Client experience with SafeTalk
Availability & Package Settings
On the top right corner inside the Booking Schedule page, you will also see a Settings button.
This section controls your availability and service visibility, where you can:
- Choose which therapy packages are available to new clients
- Restrict certain packages to existing clients only
- Temporarily stop accepting new clients while continuing sessions with current clients
This gives you flexibility to manage intake without affecting ongoing client work.
To learn more about managing new vs existing client bookings, read:
👉 How to Stop Bookings for New Clients While Keeping Your Existing Clients on Track
Finalizing Your Schedule
Once you’re satisfied with your setup, review your schedule. You can always go back to make changes, add new slots, or delete unwanted ones.
We hope this guide helps you efficiently manage your bookings with SafeTalk. If you need more help, feel free to reach out to us!