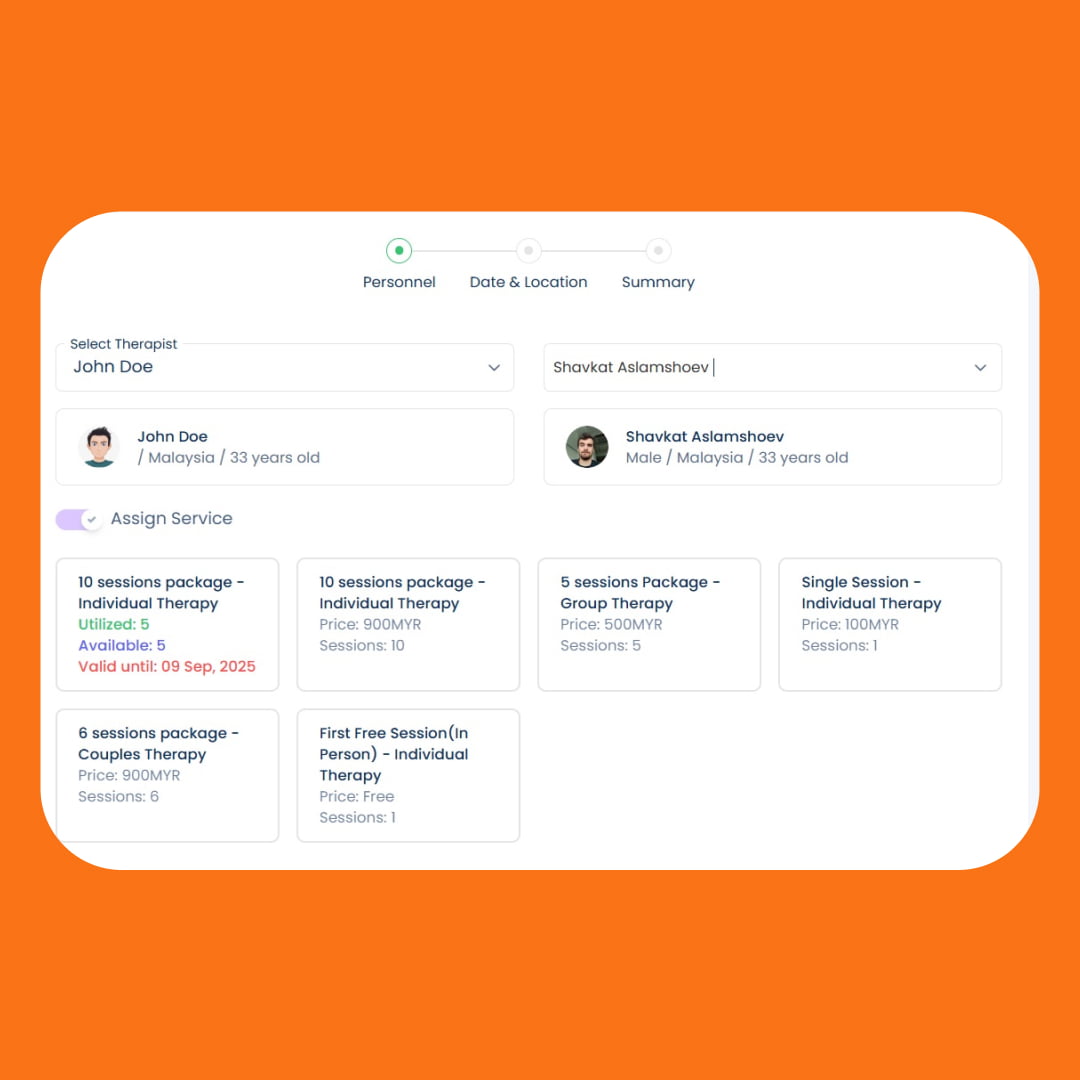
While, it is easy for your clients to book a session with you(the therapist) using the “Booking” page, sometimes you may need to create a session on the client’s behalf. Setting up a new session with your Client on SafeTalk is simple and intuitive. Let’s learn how we can do that.
Create a session
- Login to your SafeTalk account
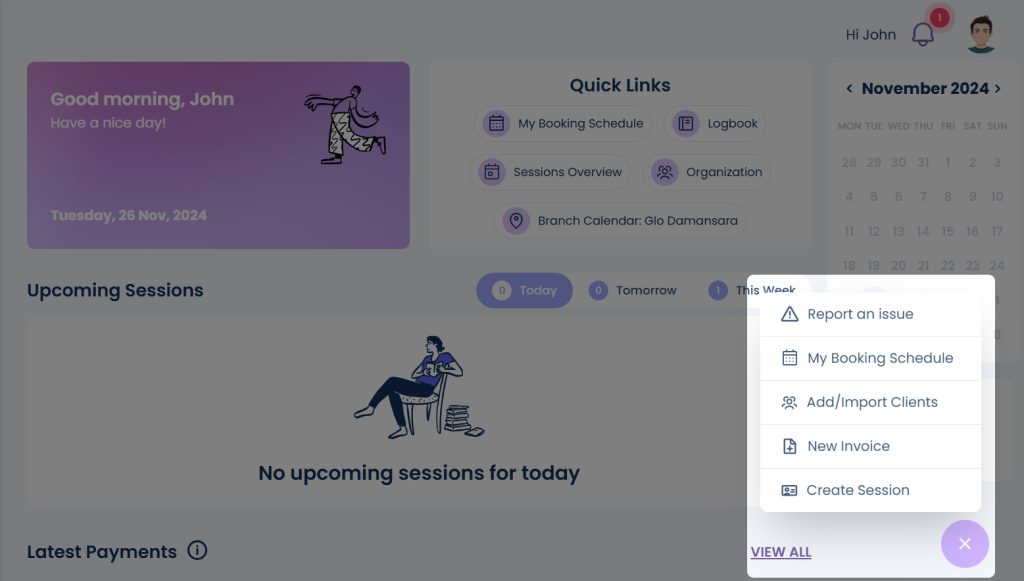
- On top bottom right of the screen you will see a plus (+) button, click on that & select “Create Session”
Session participants
Next, we add the participants to the session. Depending on your account type & permissions you will have different steps here:
If you are a Centre Manager or have permission to manage session for your team, You will have the option to select the Therapist & the Client
If you are an Therapist under a center you will only see the option to select a Client. This means you will be automatically assigned as a Therapist to this session
Note: to select a client, click on the dropdown button that says “Select a client” & start typing the client’s name. The matched results will be shown in the dropdown.
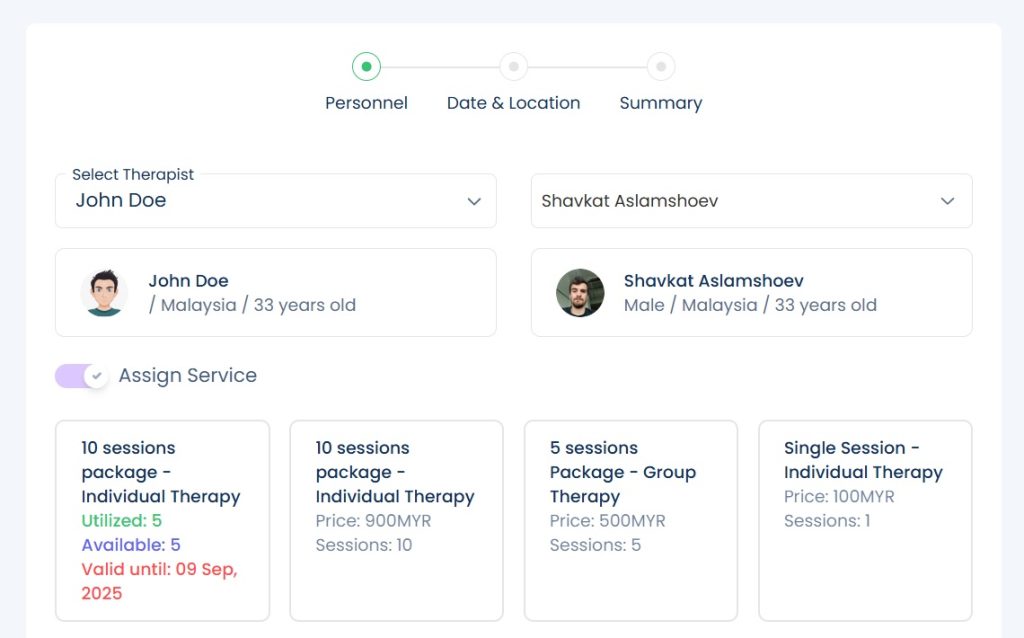
Next you have an option to assign a Service/Therapy Package for this session. You can select an existing active Service or assign a new Service Package.
If a new service is assigned to the client an automatic invoice will be assigned and emailed to the client, along with the session details.
Session Details
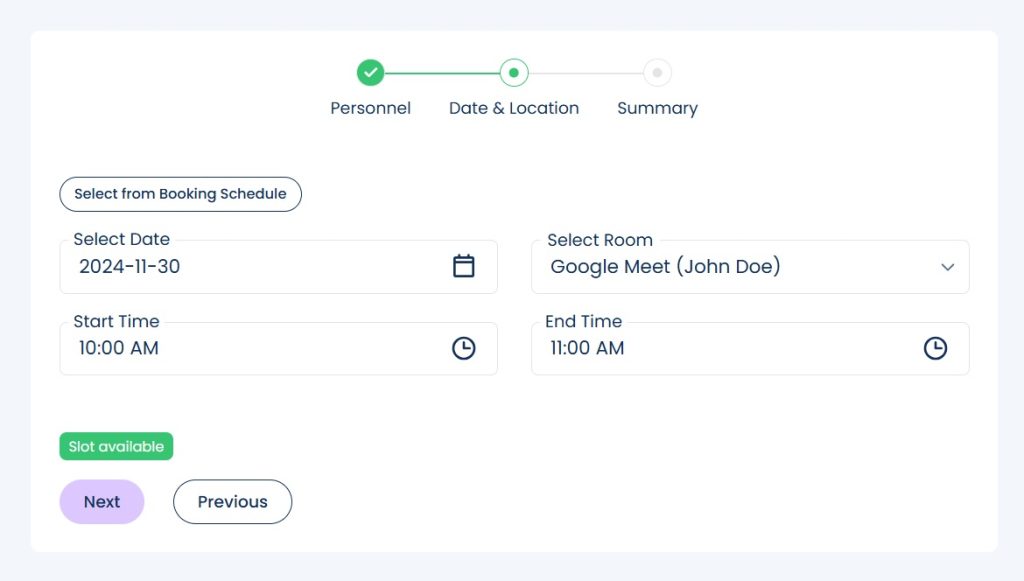
In the next screen we can setup the session details, such as date, time & location. There are two options here:
- Select an availability slot from your calendar, by clicking on Select from Booking Schedule
- Or manually enter the date, time & location of the session
Automatic Availability Check
The system will automatically check the therapist’s, client’s & the room’s availability, to ensure all the parties involved are available for the Session. If the therapist or the room are not available at the selected time & date, you will see a notice with the message. Examples of the messages are:


Once you see the “Slot Available” notice, that means, all parties are available, you can click Next to proceed to the next step.
Confirm Details & create the Session
You can verify the session details once again in the summary page, & if all good, click on “Confirm” to create the session, and you are done.
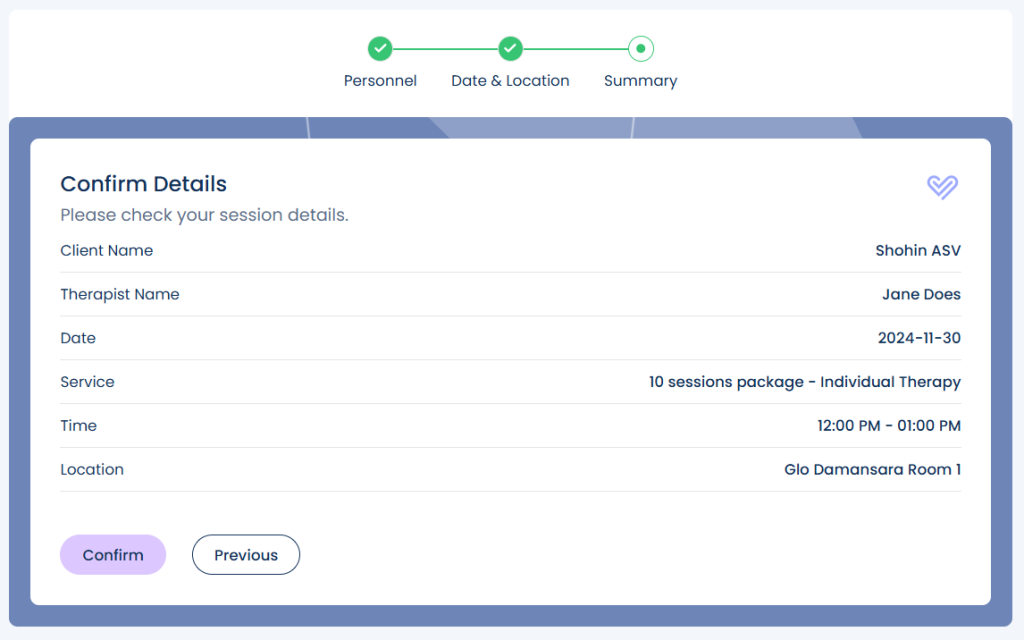
Immediate email confirmation will be sent to the Client with the session details. The Client will also be notified about the session once again 24 hours prior to the Session starting time
Want to know to reschedule & cancel sessions – click here


